Fractal Spirographs
Table of Contents
In a blog post recently, I discovered how to create 2D fractals from spirographs. Intrigued by the possibilities of this technique, I decided to experiment with it further. I found that by controlling just a few variables, I could generate a wide variety of patterns. I hope you enjoy this exploration of a beautiful and complex mathematical concept just like I did.
You can try to change variables such as RadiusFallOff, RotationSpeed, etc. to get more shapes. Color is added by mapping angle of rotation to HSL space. You can change saturation to give it a grayscale or more colorful look.
The Setup
Spirograph is a geometric drawing device that produces mathematical roulette curves. But you may know them widely as stencils in shape of gears which we have used in childhood to draw beautiful works of art.
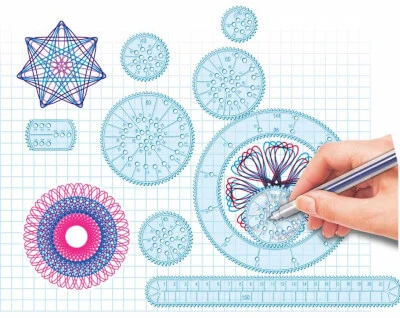
A digital spirograph is created by rotating multiple circles relative to each other and tracing the path of the center of the last circle. It is essentially a simulation of the classic spirograph, which involved rotating a stencil and tracing a point on it to create intricate and repetitive patterns.
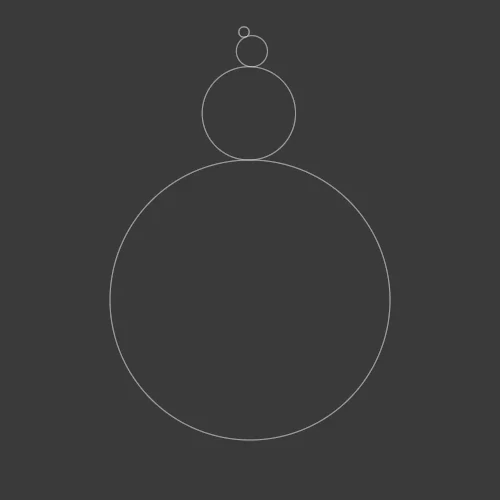
We can specify the size, position, and rotation speed of each circle to create a wide variety of patterns. There are four major parameters that affects generated pattern:
- Number Of Circles: As we increase number of circles keeping other factors constant we get more intricate pattern.
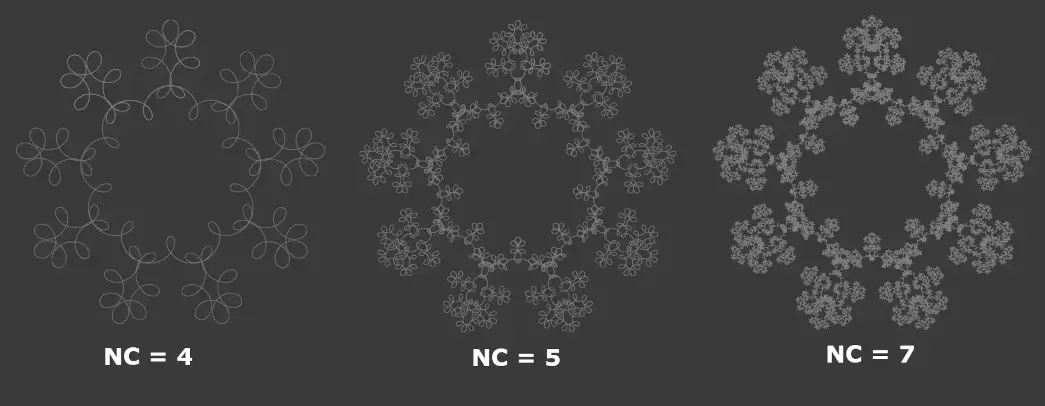
- Rotation Speed: Rotation speed is another major parameter that dictates the generated fractal pattern. More the base speed of rotation more detail can be rendered during the same revolution. Not only the speed, direction of rotation also changes the pattern. You can refer the comparison below:
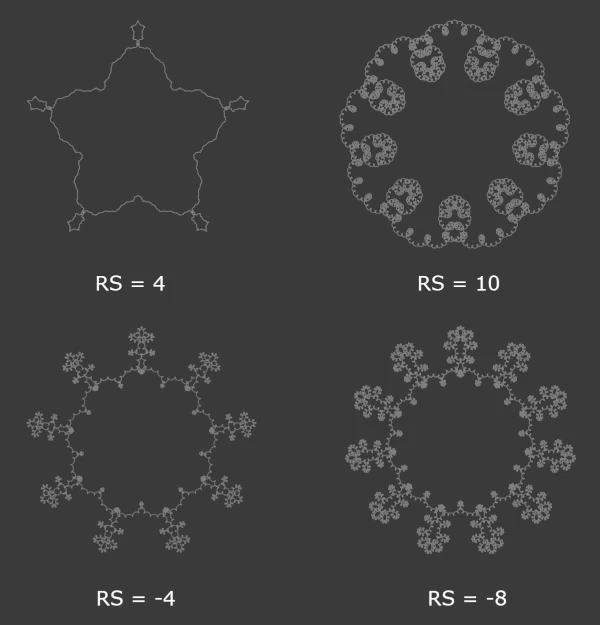
Rotation Speed of circles are distributed exponentially. So for an i-th circle speed is calculated as:
where, k = supplied rotation speed
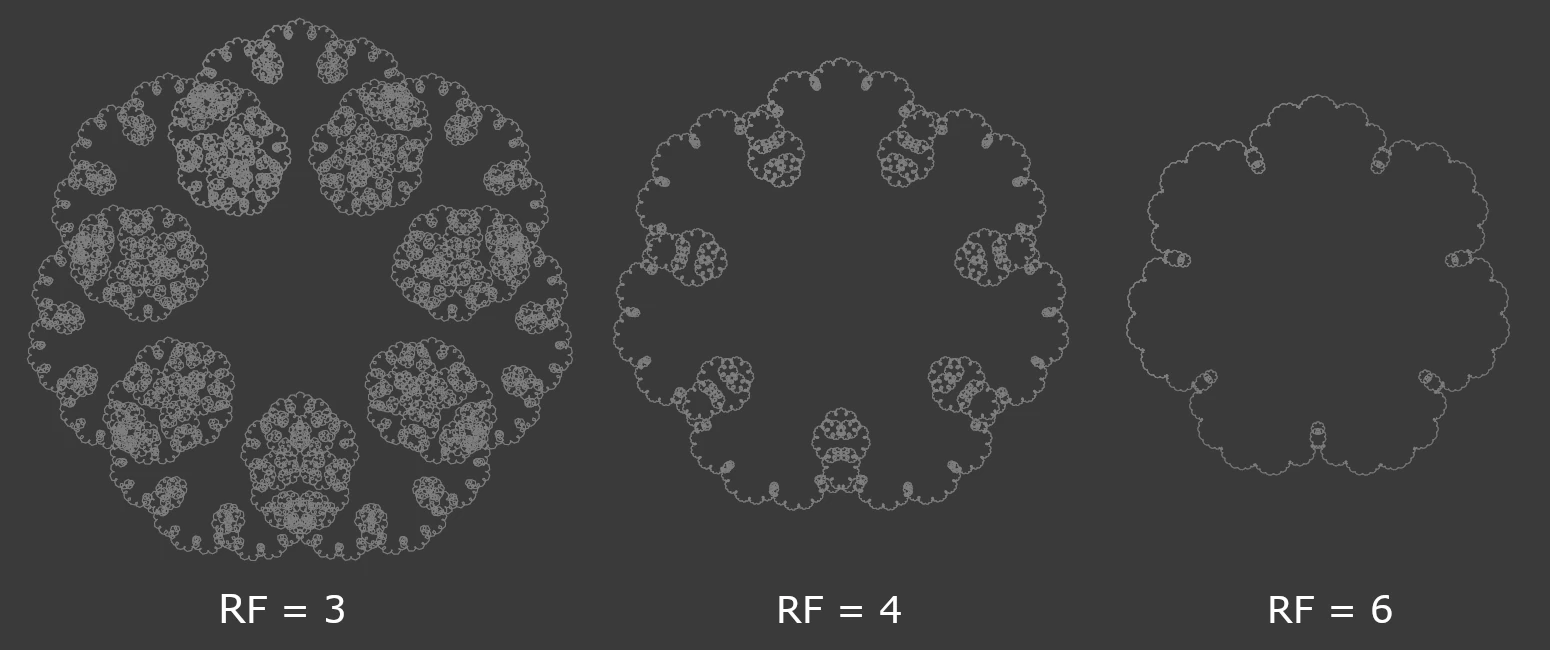
- Radius Falloff: Radius fall off controls the radius of subsequent circles. For example: If radius fall off is 2 each subsequent circle's radius would be halved. So more the value, smaller would be the details; as you can see the in the figure below:
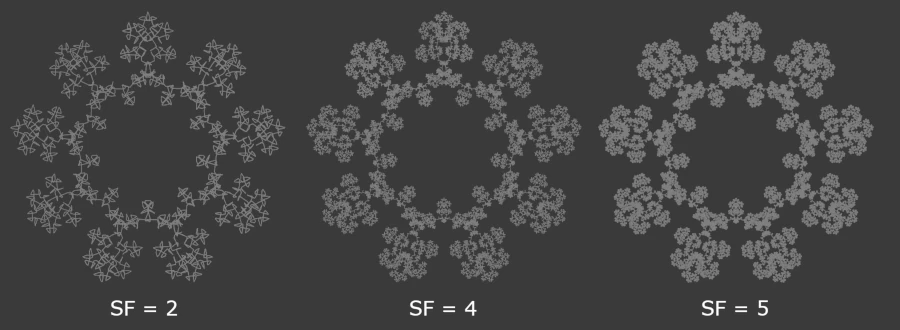
- Speed Falloff: Speed fall off directly affects rotation speed of a circle along with the provided base speed.
where, k = supplied rotation speed, sf = supplied speed fall off
More the value of fall off, less would be the speed of rotation, hence more details can be rendered.
Now lets see how we can use the above parameters in code.
Implementation
- First we will define a circle class with some properties.
class Circle {
    constructor(center, radius, rotateSpeed) {
      this.x = center.x;
      this.y = center.y;
      this.radius = radius;
      this.rotateSpeed = rotateSpeed;
      this.angle = MathUtil.toRadian(90);
    }

    draw(ctx) {
      ctx.beginPath();
      ctx.arc(this.x, this.y, this.radius, 0, MathUtil.PI2);
      ctx.strokeStyle = "#ffffff";
      ctx.stroke();
    }
}
- The hinge of rotation of any circle in the system is the center of previous circle. So we update the center of circle based on the center of previous circle and angle it need to rotate.
class Circle {
  ...

  rotate(parent) {
      this.angle += this.rotateSpeed;

      this.x = parent.x + (parent.radius + this.radius) * Math.cos(this.angle);
      this.y = parent.y + (parent.radius + this.radius) * Math.sin(this.angle);
  }
}
- Now let us put it together to create a Spirograph system.
const START_RADIUS = 140

class System {
    constructor(numCircles, rotateSpeed, radiusFallOff, speedFalloff) {
        this.circles = [];
        this.numCircles = numCircles;

        // calculate the falloff based on rotation speed
        let fallOff = Math.pow(rotateSpeed, speedFalloff);

        // add root circle, which does not rotate
        let root = new Circle(new Vector2(0, 0), START_RADIUS, 0);
        this.circles.push(root);

        for (let i = 1; i < this.numCircles; i++) {
            let prevCircle = this.circles[i - 1];

            // calculate i-th circle radius using fall off value
            let circleRadius = prevCircle.radius / radiusFallOff;

            // align this i-ith circle on top of previous circle
            let circleY = prevCircle.y + prevCircle.radius + circleRadius;

            // calculate its final speed
            let circleRotationSpeed = Math.pow(rotateSpeed, i - 1) / fallOff;

            let next = new Circle(new Vector2(0, circleY), circleRadius, circleRotationSpeed);
            this.circles.push(next);
        }
    }
}
We loop through number of circles, and for every circle we calculate its radius, position and speed and push into circles array.
- Next we update the system which is fairly straightforward. We loop through the circles and call its rotate function.
class System {

  ...

  function update() {
    for (let i = 1; i < this.numCircles; i++) {
        this.circles[i].rotate(this.circles[i - 1]);
    }
  }
}
- Now comes the last step i.e Rendering the pattern, which is the path taken by last circle's center in our Spirograph system. To render it, we will store the last circle's center and draw a line from it to current center position.
class System {

  ...

  function update() {
    // save the center of last circle before updating, we will use it in render to draw the line
    let lastCircle = this.circles[this.numCircles - 1];
    this.prevPoint = new Vector2(lastCircle.x, lastCircle.y);

    for (let i = 1; i < this.numCircles; i++) {
        this.circles[i].rotate(this.circles[i - 1]);
    }
  }

  function render() {
    let lastCircle = this.circles[this.numCircles - 1];

    ctx.strokeStyle = "white";
    ctx.lineWidth = 1;
    ctx.beginPath();

    // draw the line from last circle's previous center to current center
    ctx.moveTo(this.prevPoint.x, this.prevPoint.y);
    ctx.lineTo(lastCircle.x, lastCircle.y);
    ctx.stroke();
  }
}
Now tying up everything,
function main() {
  // taking example values
  let system  = System(10, 3, -8, 4);

  loop {
    system.update();
    system.render();
  }
}
That's all on this, I hope you enjoyed this post. If you're looking for more tech content, be sure to check out my other blog posts or subscribe below.